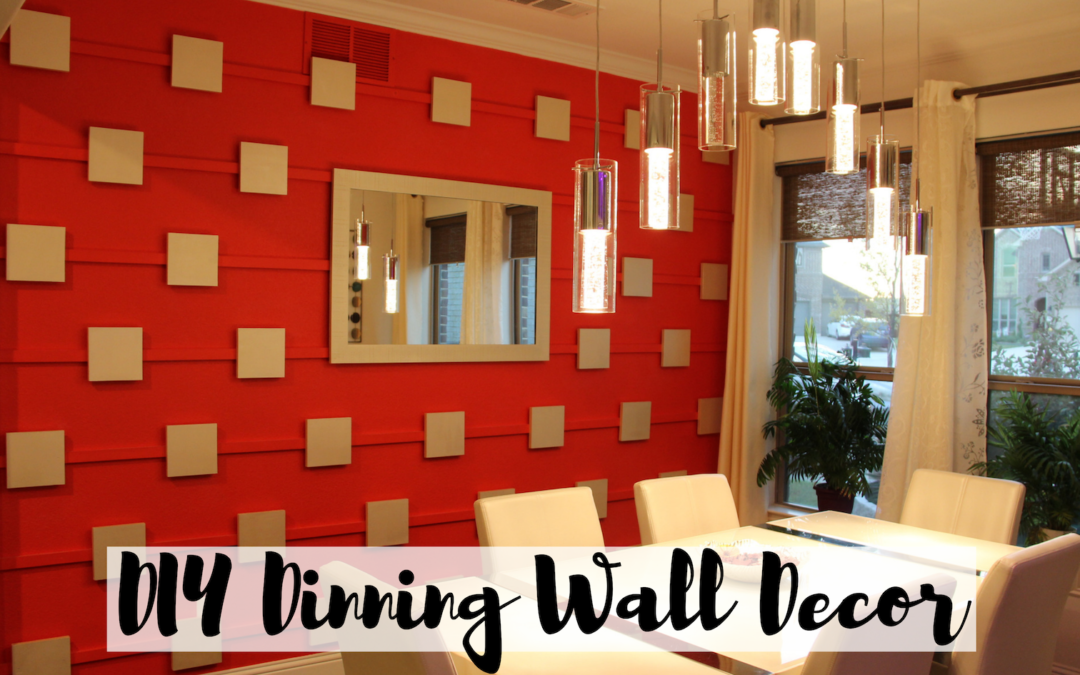
We always wanted a bold color wall decor in our home where we can take photos when we host party. We went through multiple thoughts, choices and finally settled down on Red color. Yes, Red color, not a common choice, but we like to be different.
When we moved into our brand new home, all walls were white, hence all walls in our home was our playground to experiment. We chose our formal dining room for this project. Beside adding red color to the room, we also chose to add the accent color of satin cream thereby matching it with drapes and furniture in the room.
Continue reading this post to see what we did and how we did this project
DIY Skill Level Needed:
Materials
- Wood Type 1: Pine wood 1″ X 2″ – 8 Ft Trim Board Primed Finger-Joint
- Wood Type 2: Pine wood 1″ X 6″ – 8 Ft Primed Finger-Joint Pine Trim Board
- Paint Color 1: Flat Red (BHER)
- Paint Color 2: Satin Cream (Ralph Rauren)
- Painters Tape: Frog Tape
- Screws: 2 1/2″ Construction Screws
- Nails: 1 1/2″ 18-Gauge Brad Nails
Day 1
Preparing the wall: Covered all 4 sides of wall with Frog Tape (Painter’s tape) to secure the surrounding walls from seeping the paint. Removed the electric outlet plates and covered that area with painter’s tape.
Then painted wall with 2 coats of Red color. Waited 2 hours between applying coats.
Red color wall is ready
Next, we cut the wood panels of 1″ X 6″ – 8 Ft into square pieces of 6″ X 6″. The wall dimensions were 10 Ft X 10 Ft. Hence to cover the whole wall it required around 40 small square pieces
Next: Wood painting. Painted 10 (1″ X 2″ – 8 Ft) woods in Red color. Then continued painting 40 (6″ X 6″) small wood squares in satin cream color. Left the woods to dry overnight.
Day 2
Once the wood squares and stripes dried completely, they were ready to be installed on the wall. Red painted woods were placed horizontally (Step 2 in below picture), so that they are secured to studs with 2 1/2″ screws. Around 7 rows were installed with equal distance between each row. As mentioned earlier, our wall dimension was 10 Ft X 10 Ft and the wood length were 8 ft. Hence we added 2 Ft extra wood on each row. Later, we covered the wood strip joints with wood putty.
After horizontal woods were secured to stud, we continued with placing square wood panels (Step 3 in below picture). The panels were placed with equal intervals in each row and offset with alternate rows
For décor, we placed the mirror in the center. The mirror sides were painted in satin cream color thereby matching it with ascent colors
A mirror in the center completed the wall decor
Once installing squares and mirror was completed, nails and joints were covered with wood putty. Finally, completed the project with last coat of painting wood strips with red color and square panels with satin cream color
Vola!!! Dinning Room Reveal!!!
Beautiful red wall is ready to be photographed 🙂
Total 7 rows of horizontal long wood strips, 39 small woods and a mirror in the center were installed. Observe the offset placing of square wood panels in alternate rows
Tools
Because we had the below tools in our tool collection, this project was very easy to complete in a weekend
1. To paint the wall : 9″ rollers, Roller Handle,
2. To cut wood : Ryobi Circular Saw
3. To install horizontal red wood strips (Step 2 in Day 2 Section): Ryobi Cordless Drill
4. To install small square wood panels (Step 3 in Day 2 section): Ryobi Finishing Nailgun
Thank you for reading our post. Comments are welcome. Please like and share on Facebook, Instagram, Twitter. In case of any questions, please contact us.


