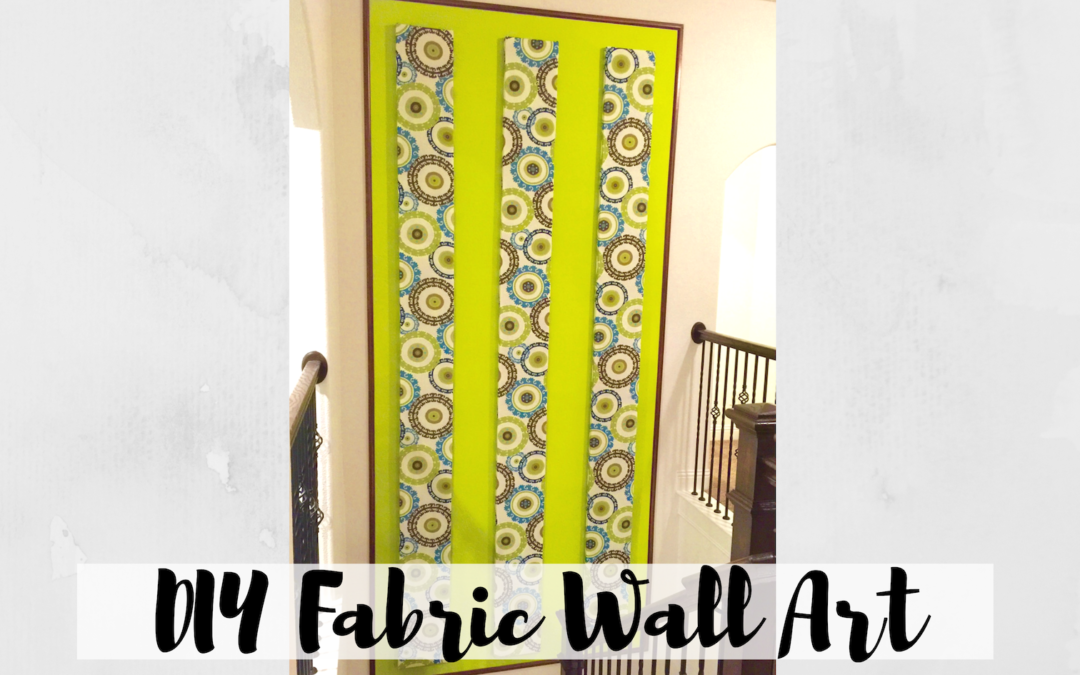
Fabric décor is one of the easiest, cheapest and elegant décor anyone can do. This time our idea is to put fabirc wall art on the stairway wall. It is 15 Ft high wall, where the fabric wall art decor in combination with paint would look elegant. The project is so easy that can be completed in 1 weekend.
Continue to read this post to see what we did and how we did it.
DIY Skill Level Needed:
Materials
- Fabric – Home Decorator Fabric
- Wood – 1 in. X 2 in. X 12 Ft Wood
- Paint – Contemporary Modern Green , Flat Sheen (BHER) – got it in Home Depot
- Staples – T50 Staples
- Moulding – Polystyrene Mahogany Base Moulding
Before Picture
12 Ft Wall as indicated in picture to be decorated
Day 1: Shopping and Painting
We started with shopping at Joann Store for Fabric. OMG, there are lot of options to choose from at Joann’s. After searching for a while, selected 54″ geometric patterned drapery fabric. Our wall is 15ft and decor planned is to create 3 fabric panels of 1 Ft X 12 Ft each. So it requires around 4.5 yards of fabric to create 12 Ft long panel. Since the fabric is 54 inch wide, 3 pieces of 18 inch each width could be created and good enough to create 3 panels of 12 inch (1 FT) width.
Fabric we selected
Shopping continues at Home Depot for wood (to build frame for fabric wall art), paint, moulding.
Found 1 In. X 2 in. X 12 Ft wood with which the base frame can be built. 8 pieces of wood is enough to create 3 fabric panels. Key here is to make sure the frames are light weight, so that they can be hanged with just 2 screws on the wall. So make sure to chose the right wood.
Next choosing paint. Home depot have great collection of all modern colors in paint section. Selected Contemporary Modern Green paint to match the green color in the fabric.
And last but not least, the moulding as shown below picture
Back to home and Project begins
Preparing the wall to paint: As the wall is 15 Ft high X approx. 8 Ft wide, equal distance is measured from all sides and the area of 14 Ft X 7 Ft in the center is marked. After marking the boarders, covered exterior of boarder with painters tape so that paint is not seeped outside marked area.
Once the wall is ready, painted the area with green color. 3 coats of paint is applied.
Day 2: Fabric wall art creation and installation
First: Creating frames of 12 FT X 1 FT. Since the panels are 12 FT high, need to add support in the middle as shown in below picture, so that they are sturdy. In the end, as expected, the frames became very light weight, such that they can be hanged on 2 screws on wall
Now, its time to work on fabric. To cover the entire length of the frame of 12 FT, we cut the fabric of 13 FT (4.3 Yards or 156 Inch), so that, have fabric left to wrap around the frames. Thus the fabric is 156 inch long and 54 inch wide.
54″ wide fabric is cut into 3 pieces of 18 inch. Thus we have 3 fabric strips of 156″ X 18″ enough to wrap around 12 FT X 1 FT frames
Image showing 54″ fabric cut into 3 pieces of 18″ each
Since the fabric is little thin, without lining cloth when the fabric was wrapped, observed that the frame was visible through fabric under light. Hence had to add lining cloth and it was cut to the length & width to match the fabric dimensions.
Now with all fabric ready, its time to prepare the fabric frames. First, wrapping lining cloth. Wrapped the cloth as tight as possible, so that there are no creases created. Then, used the staple gun to attach the lining onto frame. Further continued with fabric. Again, used staple gun to attach fabric to frame on the backside.
As we forgot to take picture when preparing the panels, found the sample picture showing exactly what we did.
After done attaching the fabric, 3 panels were ready to be hanged on the 15 FT wall. The panels turned to be very light weight even with 12 ft height becasue we chose light weight soft wood for making panels.
Measured equal distances from the painted area and divided the area into 3. And found studs in the required area. Then put the 2 1/2″ construction screws to the studs. Added 2 screws per panel at the top on which the panels can be hanged evenly, it’s just like hanging any photo frame.
The panels were not hanging straight. Probably because of the height. So to keep them firmly in place, we put construction screws around the panels(outside) at the top and at the bottom as shown in below picture
Installing panels is done. Now adding the border around the paint. We cut trim edges to 45 degrees to make the 90 degree corner joints. Trims were installed with 2 1/2″ finishing nails using Ryobi Nailgun.
Even though the paint edge was really smooth and straight, the entire set-up seemed unfinished until finishing trim/ moulding was added. Loved the finished set-up 🙂
Once the trim was added around the paint, the project is completed.
Vola!!! Fabric Wall Decor Reveal
Tools
Because we had the below tools in our tool collection, this project was very easy to complete in a weekend
- To paint the wall : 9″ rollers, Roller Handel
- To attach the fabric: Staple Gun
- To Cut Wood and Trim: Ryobi Miter saw
- To Install Panels: Ryobi Cordless Drill
- To Install Trim: Ryobi Finishing Nailgun
Thank you for reading our post. Comments are welcome. Please like and share on Facebook, Instagram, Twitter. In case of any questions, please contact us.


Very nice post. Easy DIY Project for Big impact.
Thank you Jen